
Have you ever wondered what to do with an old computer? If you’re like me, you’d rather see an item repurposed or recycled before it’s sent off to the landfill. Not only will your old computer and other electronics sit in a landfill beyond our lifetimes, any electronic left to deteriorate could potentially leak dangerous chemicals into the earth. In fact, there are many items that are banned from landfills and are not supposed to be placed into trash cans or picked up by trash collectors, including old TVs, DVD players, VCRs, cassette decks, CD players, cell phones, alarm clocks, video cameras, desktop computers, laptops, printers, video game consoles, iPods, and more. So, what to do with your old items?
Repurpose an old computer into unique art pieces
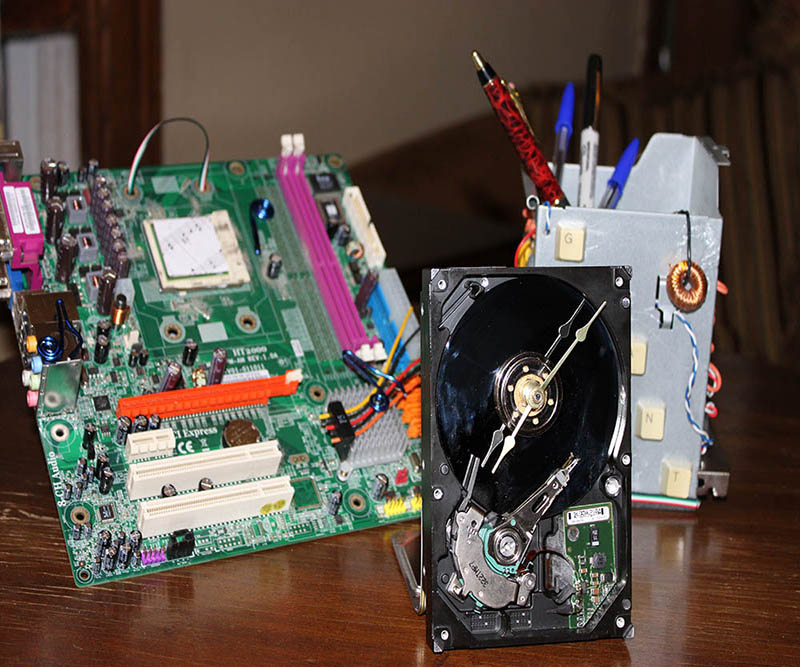
Since our Dad works with computers and happens to have a collection of old computer parts, we decided to create some unique art pieces for Father’s Day.

One afternoon, Melinda, Sharon, and I gathered together a bunch of old computer parts, a few tools, some glue, and set out to create some unique art pieces. Click through the photos below for some highlights of our project.


We had fun creating art from old computer parts. And our projects turned out great! Turning a hard drive into a clock was much more challenging than I had anticipated, and took the most time of the three projects, but was well worth the effort. Both the circuit board wall art and pencil holder are colorful, unique pieces. All three projects were a success.


Recycle Your Old Computer
Still have old computer parts that you’re not sure what to do with? Take them along with your old monitor and other electronics to Best Buy for recycling. Watch this video to see what happens to your old computer then visit their website for complete details.
I am a Freelance Graphic Designer full of creative interests! In my spare time, I love to create something new from something old, embark on home decorating and renovation projects, try out new recipes, and attempt to garden. Beyond the artistic pursuits, I have a love for music and enjoy playing the piano and handbells.


